Making anaglyph images, Methods and software |

Making anaglyph images, Methods and software |
 Aug 17 2012, 09:20 PM Aug 17 2012, 09:20 PM
Post
#1
|
|
|
Member  Group: Members Posts: 252 Joined: 5-May 05 From: Mississippi (USA) Member No.: 379 |
I have found more than one good program to make anaglyphs from the same size images of the L & R HAZ and NAV Camera's, but for long baseline anaglyphs you need to do something called "registering" one of the images with the other. Five years ago I had such a program, but not any longer. Questions OS Windows 7 1. Does anyone know of such a program that is simple and effective. It doesn't have to be free - but not more than $100! 2. (GIMP) I can create anaglyphs using a Gimp plug-in, if I import the two images as layers. What I haven't been able to figure out is how to make the top layer transparent. Then assume I could slide the top layer around until it is registered. Can anyone tell me how to adjust the transparency of the top layer? Gimp is such a pain I would probably pay for a program if I did much of this. I spent about 20 hours messing about with Gimp without getting anywhere. It was only when I accidentally imported color images that the plug-in worked! So now I "increase" the color depth in my images (using Irfan), and save them out as grey-scale images with something called a "color space." It works! What can I say, the plug-in was last updated in 2008! I would love something more automated, but I won't be using it that much. |
 |
 
|
 |
|
Sep 7 2012, 11:38 PM
Post
#2
|
|
 Senior Member Group: Members Posts: 1465 Joined: 9-February 04 From: Columbus OH USA Member No.: 13 |
It's pretty easy in photoshop:
open the left and right images drag one of the images on top of the other to create two layers, don't worry about registration yet close the file you dragged--not needed any more change mode from grayscale to rgb adjust levels for the right image: set Red to 0 adjust levels for the left image: set G and B to 0 for the layer on top, set blending mode to screen now you can see corresponding elements in each picture and can try to align it in different ways with the move tool adjust overall levels for each layer for best effect -------------------- |
|
|
|
|
Sep 8 2012, 12:27 AM
Post
#3
|
||
 Senior Member Group: Admin Posts: 4763 Joined: 15-March 05 From: Glendale, AZ Member No.: 197 |
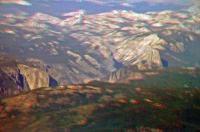
QUOTE (jmknapp @ Sep 7 2012, 03:38 PM)  It's pretty easy in photoshop: .............. adjust overall levels for each layer for best effect Et voila! Here's one I made from two photos of Yosemite National Park through an airplane window last week (@35,000 feet, roughly over Fresno, California with a 250mm lens looking East). Most of the time spent on it was cleaning up the low contrast, low saturation, color-shifted images that result when you try to take a photo through the three or four layers of plexiglass and glass of a modern aircraft window. But once I had the two cleaned up photos it was quite easy to turn it into a red-blue 3D image using Photoshop CS5 and steps similar to the process jmknapp described above.
Attached thumbnail(s)
-------------------- If Occam had heard my theory, things would be very different now.
|
|
|
|
|
|
 stewjack Making anaglyph images Aug 17 2012, 09:20 PM
 mcaplinger QUOTE (stewjack @ Aug 17 2012, 02:20 PM) ... Aug 17 2012, 09:48 PM
 stewjack QUOTE (mcaplinger @ Aug 17 2012, 04:48 PM... Aug 17 2012, 10:56 PM 3d_mars QUOTE (stewjack @ Aug 17 2012, 02:56 PM) ... Aug 18 2012, 03:31 PM stewjack QUOTE (3d_mars @ Aug 18 2012, 10:31 AM) H... Aug 18 2012, 07:01 PM JohnVV QUOTE 2. (GIMP) I can create anaglyphs using a Gim... Aug 21 2012, 09:20 PM stewjack QUOTE (JohnVV @ Aug 21 2012, 04:20 PM) si... Aug 21 2012, 11:53 PM jamescanvin QUOTE (JohnVV @ Aug 21 2012, 10:20 PM) si... Aug 22 2012, 07:21 AM
 |

|
Lo-Fi Version | Time is now: 25th June 2024 - 07:42 AM |
|
RULES AND GUIDELINES Please read the Forum Rules and Guidelines before posting. IMAGE COPYRIGHT |
OPINIONS AND MODERATION Opinions expressed on UnmannedSpaceflight.com are those of the individual posters and do not necessarily reflect the opinions of UnmannedSpaceflight.com or The Planetary Society. The all-volunteer UnmannedSpaceflight.com moderation team is wholly independent of The Planetary Society. The Planetary Society has no influence over decisions made by the UnmannedSpaceflight.com moderators. |
SUPPORT THE FORUM Unmannedspaceflight.com is funded by the Planetary Society. Please consider supporting our work and many other projects by donating to the Society or becoming a member. |
|