Perseverance Imagery, technical discussion of processing, cameras, etc. |

  |
Perseverance Imagery, technical discussion of processing, cameras, etc. |
 Apr 15 2021, 12:37 AM Apr 15 2021, 12:37 AM
Post
#136
|
|
 Member  Group: Members Posts: 691 Joined: 21-December 07 From: Clatskanie, Oregon Member No.: 3988 |
QUOTE (PaulH51 @ Apr 14 2021, 04:21 PM)  The black margins on the Mastcam-Z frames are a bit of a pain to remove manually. I do this to permit stitching in MS-ICE without leaving shadows at some of the the seams. Does anyone here know how I could use GIMP to process a batch at one session? I don't know about GIMP because i don't use it, but you can batch do this easily with PIPP. In the Processing Options > cropping section. You can experiment with the offset and crop width fields. To preview, just click on the Test Options button. 
|
 |
 
|
|
Apr 15 2021, 02:48 AM
Post
#137
|
||
 Member Group: Members Posts: 219 Joined: 14-November 11 From: Washington, DC Member No.: 6237 |
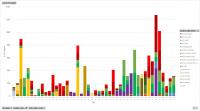
I just ran across this, and thought folks would find it very useful: full metadata in csv format for M2020 pics, updated several times daily. In both incremental files and one master one.
https://www.kaggle.com/sakethramanujam/mars...0imagecatalogue Heck, you can even do stats with it...
And regarding cropping a bunch, I can always recommend ImageJ/FIJI. 1. File > Import > Image Sequence (or Stack From List) 2. Select rectangle. 3. Edit > Crop. Done. Optional 4. Record as macro for later use. |
|
|
|
|
|
|
Apr 17 2021, 07:53 AM
Post
#138
|
||
 Newbie Group: Members Posts: 16 Joined: 1-April 21 From: La Crescenta, CA Member No.: 9001 |
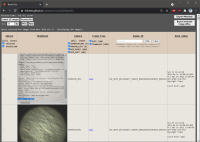
QUOTE (PaulH51 @ Apr 14 2021, 03:21 PM) The black margins on the Mastcam-Z frames are a bit of a pain to remove manually. I do this to permit stitching in MS-ICE without leaving shadows at some of the the seams. Does anyone here know how I could use GIMP to process a batch at one session? Grateful for any advice Here ya go! Download this batch-crop GIMP script, and save it here: CODE %appdata%\GIMP\2.10\scripts This script operates destructively on all images matching a filename pattern, saving the cropped images over the original image files. To use this script, put all of the images you want to crop into a specific folder, then navigate in windows command prompt to that folder. Then call gimp from there, like so: CODE "c:\Program Files\GIMP 2\bin\gimp-2.10.exe" -i -b "(batch-crop \"*.png\" 1604 1196 25 4)" -b "(gimp-quit 0)" In this case it will crop all png's in the current working directory to 1604 x 1196 (offset 25px from the left and 4px down) and save over the original files. I hope it's useful! I'm also looking into content-aware filling the black schmutz in the Watson images - at least the larger spot, hopefully also the smaller ones if I can figure out how to load a schmutz map reference image. Unrelated, I added an interesting feature to roverpics. You can now hover over any thumbnail to see the metadata for that image. I also calculate local-level azimuth for each image and added that to the metadata. If you ever spot an interesting terrain feature and want to know which direction it is (relative to cardinal north) from the rover, this is a quick way to find out, just hover over the image and you'll find it toward the bottom.
Thanks to Thomas Appéré for reporting a couple of glitches earlier this week. The page should now return all full-frame and thumbnail still frames and movie frames. Cheers |
|
|
|
|
|
|
Apr 18 2021, 02:01 AM
Post
#139
|
||
|
Junior Member Group: Members Posts: 20 Joined: 6-August 20 Member No.: 8852 |
QUOTE (Ryan Kinnett @ Apr 17 2021, 03:53 PM) Here ya go! Download this batch-crop GIMP script, and save it here: CODE %appdata%\GIMP\2.10\scripts This script operates destructively on all images matching a filename pattern, saving the cropped images over the original image files. To use this script, put all of the images you want to crop into a specific folder, then navigate in windows command prompt to that folder. Then call gimp from there, like so: CODE "c:\Program Files\GIMP 2\bin\gimp-2.10.exe" -i -b "(batch-crop \"*.png\" 1604 1196 25 4)" -b "(gimp-quit 0)" In this case it will crop all png's in the current working directory to 1604 x 1196 (offset 25px from the left and 4px down) and save over the original files. I hope it's useful! I'm also looking into content-aware filling the black schmutz in the Watson images - at least the larger spot, hopefully also the smaller ones if I can figure out how to load a schmutz map reference image. Unrelated, I added an interesting feature to roverpics. You can now hover over any thumbnail to see the metadata for that image. I also calculate local-level azimuth for each image and added that to the metadata. If you ever spot an interesting terrain feature and want to know which direction it is (relative to cardinal north) from the rover, this is a quick way to find out, just hover over the image and you'll find it toward the bottom.
Thanks to Thomas Appéré for reporting a couple of glitches earlier this week. The page should now return all full-frame and thumbnail still frames and movie frames. Cheers Thank you for sharing, The website is very good! I don't know how to call gimp, can you share a screenshot? Thank you! |
|
|
|
|
|
|
Apr 18 2021, 04:04 AM
Post
#140
|
|
|
Founder Group: Chairman Posts: 14433 Joined: 8-February 04 Member No.: 1 |
QUOTE (PaulH51 @ Apr 14 2021, 03:21 PM) Does anyone here know how I could use GIMP to process a batch at one session? Don't even need GIMP. Irfanview's batch conversion output format options have a crop section. https://www.youtube.com/watch?v=Z_eEKD8AJz0 |
|
|
|
|
Apr 21 2021, 02:08 AM
Post
#141
|
|
|
Newbie Group: Members Posts: 16 Joined: 1-April 21 From: La Crescenta, CA Member No.: 9001 |
QUOTE (djellison @ Apr 17 2021, 08:04 PM) Don't even need GIMP. Irfanview's batch conversion output format options have a crop section. I prefer ImageMagick and PIPP myself. I made the gimp script partly to get my feet wet with it before trying to leverage the Resynthesizer tool to remove the black smudge in Watson images. Along the same vein (using a canon to kill a fly), I made a debayer action for Photoshop. It uses bilinear interpolation to demosaic any RGGB mosaic raw image, preserving its original dimensions. The method is based on this tutorial which is pretty up-front about being more of an existence proof than a practical solution. Indeed, it's awfully inefficient, throwing away 75% of its own calculations which are necessary to fit into the photoshop framework. A single full-frame navcam raw image takes about 5 seconds to process with this method. It's clearly not practical for batch processing, but may be useful for single-image operations. |
|
|
|
|
Apr 21 2021, 05:30 PM
Post
#142
|
|
 Senior Member Group: Members Posts: 4251 Joined: 17-January 05 Member No.: 152 |
QUOTE (Ryan Kinnett @ Apr 21 2021, 03:08 AM) It's clearly not practical for batch processing, but may be useful for single-image operations. See this thread and elsewhere in this forum for lots of suggestions for deBayering. It is so easy now that we have un-jpegged raws with M20! |
|
|
|
|
May 3 2021, 10:03 PM
Post
#143
|
|
|
Senior Member Group: Members Posts: 2837 Joined: 22-April 05 From: Ridderkerk, Netherlands Member No.: 353 |
James,
I use BIC ( Batch Image Cropper). Google for it. It works great and very fast. Jan van Driel |
|
|
|
|
May 14 2021, 12:24 AM
Post
#144
|
|
|
Member Group: Members Posts: 411 Joined: 18-September 17 Member No.: 8250 |
QUOTE (PDP8E @ Mar 1 2021, 03:07 PM) The cameras used for rover lookdown and lookup are AMS CMV20000 here is the datasheet from AMS Note - Per (Maki et al. 2020), engineering cameras use the CMV-20000 detector from AMS. The EDL (downlook and uplook) cameras are a mixture of On Semi P1300 and Sony IMX265 detectors. (See Table 4 on "Page 31 of 48") |
|
|
|
|
May 18 2021, 12:07 AM
Post
#145
|
|
|
Senior Member Group: Members Posts: 4251 Joined: 17-January 05 Member No.: 152 |
QUOTE (Brian Swift @ May 15 2021, 12:19 AM) My take on processing the Descent Down-Look Camera raw images. Left image colors are based on camera response and and illumination optimized from calibration target on top of rover, and includes chromatic adaption from modeled illuminant to D65 standard. In right image, only camera response is modeled and illumination is fixed at D65, so no chromatic adaption is applied. This looks impressive, Brian. I'm curious about the general approach. You need to get from the sensor raw colour space into some standard space, using an IDT or "forward" matrix, before finally sRGB or whatever. How do you find that matrix: using the published CFA response curves for the IMX265 sensor, or by fitting the matrix elements to the expected standard-colour-space values for the calibration target patches? And are you assuming blackbody illumination, at a temperature that you fit for? |
|
|
|
|
May 18 2021, 06:48 AM
Post
#146
|
|
|
Member Group: Members Posts: 411 Joined: 18-September 17 Member No.: 8250 |
QUOTE (fredk @ May 17 2021, 04:07 PM) This looks impressive, Brian. I'm curious about the general approach. You need to get from the sensor raw colour space into some standard space, using an IDT or "forward" matrix, before finally sRGB or whatever. How do you find that matrix: using the published CFA response curves for the IMX265 sensor, or by fitting the matrix elements to the expected standard-colour-space values for the calibration target patches? And are you assuming blackbody illumination, at a temperature that you fit for? Thanks Fred. I'm not using the CFA curves (yet). When I started working on this, I couldn't find the curves. Then when I was building up the references list, I discovered a graph of them in a different FLIR doc than what I had been using. So, I'm fitting the matrix and blackbody temperature. The fit minimizes the RMS of CIE2000 color distance between raw RGB values transformed to XYZ color via matrix and XYZ color values for calibration target patches derived from target reflectance measurements and and blackbody illuminant. I don't consider the modeling of the illuminant as a blackbody to be well justified. The calibration target isn't directly illuminated. I did some experiments with more flexible illuminant models, but they produced some extreme results that I suspect were due to over-fitting the limited number of calibration patches. (I'm not using the white and light grey patch because they are over-exposed (clipping) in the raw data.) The above description applies to the left image in the video, the right image just fits the matrix assuming calibration patches are illuminated by D65. I've uploaded a PDF of the notebook so anyone interested can view it without a Mathematica viewer. https://github.com/BrianSwift/image-processing |
|
|
|
|
May 19 2021, 07:07 PM
Post
#147
|
|
|
Senior Member Group: Members Posts: 4251 Joined: 17-January 05 Member No.: 152 |
Thanks for the details, Brian, and for the pdf.
QUOTE (Brian Swift @ May 18 2021, 07:48 AM) So, I'm fitting the matrix and blackbody temperature. The fit minimizes the RMS of CIE2000 color distance between raw RGB values transformed to XYZ color via matrix and XYZ color values for calibration target patches derived from target reflectance measurements and and blackbody illuminant. I don't consider the modeling of the illuminant as a blackbody to be well justified. The calibration target isn't directly illuminated. I did some experiments with more flexible illuminant models, but they produced some extreme results that I suspect were due to over-fitting the limited number of calibration patches. I have to wonder about a potential degeneracy between blackbody temperature and the matrix parameters. Ie, could you get a similarly good fit by shifting the temperature and compensating with different matrix elements, ie different CFA responses? Does your best-fit temperature sound reasonable? I guess that ambiguity would disappear if you could use the CFA curves to calculate the matrix directly. Also, the sundial target emerges into the sun a bit later in the sequence - could it be better to use those frames with the D65 model? I also worry about the small number of patches, so you're only sparsely sampling the gamut and may be quite a bit off on the colour of the ground, eg. Still, they look pretty good by eye. The main difference between your two models is with blue. I've been wondering about something like this with nav/hazcam, but the stretching of the public images might make that hard (at least to the extent that the blackpoints are shifted). |
|
|
|
|
Jun 1 2021, 11:21 AM
Post
#148
|
|
|
Member Group: Members Posts: 248 Joined: 25-February 21 From: Waltham, Massachussetts, U.S.A. Member No.: 8974 |
In an attempt to try to understand the camera model parameters in the metadata json, and therefore then the CAHVORE camera model, I ended up putting together a camera model analyzer:
https://observablehq.com/@andreasplesch/the...re-camera-model (updated for better table formatting) It is based on https://agupubs.onlinelibrary.wiley.com/doi...29/2003JE002199 and I think equivalent to the CAHVORE to Photogrammetric conversion of https://github.com/bvnayak/CAHVOR_camera_model which is in python. I tested the analyzer with the test data of the python code repo and get the same results which is a good sign. My goal is to unproject the fisheye projection of the Ingenuity cameras, and https://www-mipl.jpl.nasa.gov/vicar/dev/htm...p/marscahv.html would seem to be right tool but with a steep learning curve. In any case, I have some understanding now that the "E" parameter is for fisheye distortion, adjusting the radial distance with a third degree polynomial. Looking the json metadata, I noticed that after the 7 triples for the CAHVORE parameters, there are additional numbers like 2;0 or 3;0 . Do we know what these extra parameters are for ? Any further hints or feedback much appreciated. -------------------- --
Andreas Plesch, andreasplesch at gmail dot com |
|
|
|
|
Jun 2 2021, 01:53 AM
Post
#149
|
|
|
Member Group: Members Posts: 219 Joined: 14-November 11 From: Washington, DC Member No.: 6237 |
Andreas, this is really helpful - I have been poking at the same sources (when I have other real work to do...) and seem to be on the same track, if a bit behind - and I have been slogging in Octave and Excel, not making slick live calculation pages! Anyway, none of your results contradict what I've seen so far, including the RTE's ~2mm uncorrected focal length (with 5.9 mm sensor diag., corresponding to something like 14mm equivalent full-frame F.L., and FOV over 90 deg.) By the way, where did you find the JSON for the heli images? I've only been able to pull the Perseverence ones from the RSS feed.
QUOTE (Andreas Plesch @ Jun 1 2021, 06:21 AM) Looking the json metadata, I noticed that after the 7 triples for the CAHVORE parameters, there are additional numbers like 2;0 or 3;0 . Do we know what these extra parameters are for ? I don't know that they're needed for "normal" CAHV[ORE] processing. In the MSL CAMERA SIS, they specify "MTYPE" and "MPARMS" related to the geometric camera model. I had thought it referred to 1=CAHV/2=CAHVOR/3-CAHVORE Edit: I was half-right; at the end of the file here (linked from bvnayak's code you point to above), it explains the last 2 parameters. The MPARM value is called called L in several sources. * T: CAHVORE Type (MTYPE): MODEL_COMPONENT_8 To distinguish the various CAHVORE model types (e.g., CAHVORE-1, CAHVORE-2, CAHVORE-3), a parameter "T" is specified. It's value may be integers 1, 2, or 3 to coincide with CAHVORE-1, CAHVORE-2, or CAHVORE-3, repectively. * P: CAHVORE Parameter (MPARM): MODEL_COMPONENT_9 "P" is an additional parameter to CAHVORE that specifies the Linearity of the camera model for the CAHVORE-3 case. It is an arbitrary floating-point number. A value of 0.0 results in a model equivalent to CAHVORE-2, while a value of 1.0 results in a model equivalent to CAHVORE-1. |
|
|
|
|
Jun 2 2021, 05:13 AM
Post
#150
|
|
|
Member Group: Members Posts: 248 Joined: 25-February 21 From: Waltham, Massachussetts, U.S.A. Member No.: 8974 |
Thanks. Another mystery solved. I updated the analyzer to report T and P with a description. I also added theta, the angle between the horizontal and the vertical axis which can be off of 90 degrees according to the PDS geometry_cm document.
Unfortunately, the id query parameters which is provided for the json_link in the raw images json does not seem to work for the HELI images. But one can just use the network tab in the Chrome developer tools while filtering for the heli images and look for the json request which looks something like: CODE https://mars.nasa.gov/rss/api/?feed=raw_images&category=mars2020,ingenuity&feedtype=json&ver=1.2&num=100&page=0&&order=sol+desc&&search=|HELI_RTE&&&condition_2=91:sol:gte& There are so many great online tools. I like Observable notebooks but of course Jupyter notebooks are really nice as well. I think there is an Octave kernel for Jupyter. Python can be pretty friendly. I hope to try some Image processing next. Pixel remapping is quite possible with js, especially when using the GPU with webgl (which I hope to avoid first). See what happens when one recalculates r by subtracting the distortion delta factor given by the R polynomial, or something like that. Not sure about how to use E to unproject full fisheye. -------------------- --
Andreas Plesch, andreasplesch at gmail dot com |
|
|
|
|

|
Lo-Fi Version | Time is now: 5th June 2024 - 06:45 PM |
|
RULES AND GUIDELINES Please read the Forum Rules and Guidelines before posting. IMAGE COPYRIGHT |
OPINIONS AND MODERATION Opinions expressed on UnmannedSpaceflight.com are those of the individual posters and do not necessarily reflect the opinions of UnmannedSpaceflight.com or The Planetary Society. The all-volunteer UnmannedSpaceflight.com moderation team is wholly independent of The Planetary Society. The Planetary Society has no influence over decisions made by the UnmannedSpaceflight.com moderators. |
SUPPORT THE FORUM Unmannedspaceflight.com is funded by the Planetary Society. Please consider supporting our work and many other projects by donating to the Society or becoming a member. |
|