

MSL Images & Cameras, technical discussions of images, image processing and cameras |

  |
MSL Images & Cameras, technical discussions of images, image processing and cameras |
 May 3 2014, 11:24 AM May 3 2014, 11:24 AM
Post
#421
|
|
 Member  Group: Members Posts: 238 Joined: 15-January 13 Member No.: 6842 |
Forgive me if this has already been discussed, but I'd like to enquire about the jpeg compression in the images we receive at http://mars.jpl.nasa.gov/msl/multimedia/raw/
The jpeg compression seems to be very heavy, producing noticeable artifacts and interfering with finer details in the image. Here's an example: http://mars.jpl.nasa.gov/msl-raw-images/ms...837E01_DXXX.jpg Is this necessitated by the bandwidth concerns, huge amount of images being uploaded, or something else. Is there anywhere we can see images with little jpeg compression? Thanks. -------------------- Curiosity rover panoramas: http://www.facebook.com/CuriosityRoverPanoramas
My Photosynth panoramas: http://photosynth.net/userprofilepage.aspx...;content=Synths |
 |
 
|
|
May 3 2014, 03:44 PM
Post
#422
|
|
 Administrator Group: Admin Posts: 5172 Joined: 4-August 05 From: Pasadena, CA, USA, Earth Member No.: 454 |
I don't know for certain but have always speculated that the heavy JPEG compression is a compromise made to enable the public to see the pictures rapidly while making them very hard to use for scientific purposes -- only the people who are working on the mission have access to versions with less compression. (Most Mastcam images are returned from Mars with some level of JPEG compression already.) But all you have to do is wait a few months to see the high-quality data on the PDS, either via the Analyst's Notebook or the Imaging Node. I wish more members of this forum would work with PDS data, because the quality of the images on the Internet would be much higher.
-------------------- My website - My Patreon - @elakdawalla on Twitter - Please support unmannedspaceflight.com by donating here.
|
|
|
|
|
Sep 1 2014, 12:33 PM
Post
#423
|
|
|
Senior Member Group: Members Posts: 2346 Joined: 7-December 12 Member No.: 6780 |
Surface roughness estimate, derived from Joe's website, for Sol 735 location:
 (from green for "smooth" over yellow for "rough" to red for "very rough".) Basic steps to obtain the map: - screenshot, - hipass radius 2, - edge filter radius 2, - gauss blur 1, - differently biased linear brightness stretching, and colorizing for red, green, yellow, - adding up darkened raw screenshot and the three color maps. No DTM used. |
|
|
|
|
Sep 2 2014, 05:30 PM
Post
#424
|
|
|
Member Group: Admin Posts: 976 Joined: 29-September 06 From: Pasadena, CA - USA Member No.: 1200 |
Which image did you use? Non-map projected, map projected or Orthorectified?
Paolo -------------------- Disclaimer: all opinions, ideas and information included here are my own,and should not be intended to represent opinion or policy of my employer.
|
|
|
|
|
Sep 2 2014, 06:13 PM
Post
#425
|
|
|
Senior Member Group: Members Posts: 2346 Joined: 7-December 12 Member No.: 6780 |
The starting point has been this screenshot of Joe's website.
Maybe Joe can help which HiRISE image has been used for the tile. If you like, I could provide intermediate processed images for comparing the processing steps, and a more detailed description. |
|
|
|
|
Sep 2 2014, 06:56 PM
Post
#426
|
|
|
Member Group: Admin Posts: 976 Joined: 29-September 06 From: Pasadena, CA - USA Member No.: 1200 |
What kind of image processing software did you use?
Paolo -------------------- Disclaimer: all opinions, ideas and information included here are my own,and should not be intended to represent opinion or policy of my employer.
|
|
|
|
|
Sep 2 2014, 09:05 PM
Post
#427
|
|
|
Senior Member Group: Members Posts: 2346 Joined: 7-December 12 Member No.: 6780 |
PhotoScape v.3.6.2, no updates (for brighness stretching (including brightness inversion), edge filter, blur, removal of RGB channels), and
Corel PaintShop Pro X5, 15.0.0.183, without updates (for hipass filtering, darkening by halving average with itself, and adding of images). Intermediate images have been PNG to avoid loss of data. |
|
|
|
|
Sep 2 2014, 11:04 PM
Post
#428
|
|
|
Member Group: Admin Posts: 976 Joined: 29-September 06 From: Pasadena, CA - USA Member No.: 1200 |
Thanks. I'll see if I can duplicate the map. Good work, pretty similar to other maps I have seen on Lab.
Paolo -------------------- Disclaimer: all opinions, ideas and information included here are my own,and should not be intended to represent opinion or policy of my employer.
|
|
|
|
|
Sep 2 2014, 11:20 PM
Post
#429
|
|
 Senior Member Group: Members Posts: 1465 Joined: 9-February 04 From: Columbus OH USA Member No.: 13 |
The HiRISE imagery is from ESP018854. Here's an excerpt from the LBL file
QUOTE PRODUCT_ID = "ESP_018854_1755_RED_A_01_ORTHO"
INSTRUMENT_HOST_NAME = "MARS RECONNAISSANCE ORBITER" MAP_PROJECTION_TYPE = "EQUIRECTANGULAR" PROJECTION_LATITUDE_TYPE = PLANETOCENTRIC COORDINATE_SYSTEM_NAME = PLANETOCENTRIC MAP_RESOLUTION = 234342.21869827 <PIX/DEG> MAP_SCALE = 0.25294075413541 <METERS/PIXEL> -------------------- |
|
|
|
|
Sep 3 2014, 04:09 AM
Post
#430
|
|
|
Member Group: Admin Posts: 976 Joined: 29-September 06 From: Pasadena, CA - USA Member No.: 1200 |
OK, thanks. I had done something similar, hipass and gaussian blur, I had not included the edge detector. Interesting. Maybe the admins can move this short exchange to one of the image processing threads.
Paolo ADMIN: Done 
-------------------- Disclaimer: all opinions, ideas and information included here are my own,and should not be intended to represent opinion or policy of my employer.
|
|
|
|
|
Sep 3 2014, 02:32 PM
Post
#431
|
|
|
Senior Member Group: Members Posts: 2346 Joined: 7-December 12 Member No.: 6780 |
Hipass taken allone plus blur eliminates small neighbouring bright and dark features. To avoid this, the edge filter has been a convenient way.
A slightly different approach is using |v - 0.5| with v the hipassed pixel value, means calculating the absolute difference of the hipassed image from the 50% uniformly grey image. Here two high-resolution versions obtained by this second, and maybe more accurate approach: The 4x-stretched greyscale image, and the averaged result of some playing with colors on the raw screenshot, the greyscale image, and the radius 1-gauss-blurred greyscale image. |
|
|
|
|
Sep 18 2014, 04:57 PM
Post
#432
|
|
|
Member Group: Members Posts: 238 Joined: 15-January 13 Member No.: 6842 |
The Mastcam shows a nice Depth of Field in this image: http://mars.jpl.nasa.gov/msl-raw-images/ms...305E01_DXXX.jpg
How close was the terrain that is in focus, and how far was the terrain that appears out of focus? Are there any other Mastcam images that show such pronounced depth of field? Thanks. -------------------- Curiosity rover panoramas: http://www.facebook.com/CuriosityRoverPanoramas
My Photosynth panoramas: http://photosynth.net/userprofilepage.aspx...;content=Synths |
|
|
|
|
Sep 27 2014, 05:26 AM
Post
#433
|
|
 Member Group: Members Posts: 691 Joined: 21-December 07 From: Clatskanie, Oregon Member No.: 3988 |
QUOTE (Gerald @ Sep 26 2014, 03:00 AM)  Presuming MR images as a little too greenish, and the light as reddish.... Someone may try to get reasonable results by defining the tailings as grey. Based on my preliminary tries to adjust colors, my favored interpretation of the presumed colors is a mix of light gray with dark red material. I have settled on for my processing of Mastcam images using the following values in the channels mixer in Photoshop. I have been using these for a while now and will be using this as a standard for all my Mastcam image processing in the future. I find that using these values are roughly close to the DRCL and DRCX PDS color corrected images. <output channel selection- Red> R=106 G=0 B=0 <output channel selection- Blue> R=0 G=0 B=113 Then I lower the brightness if necessary. I hope this helps. 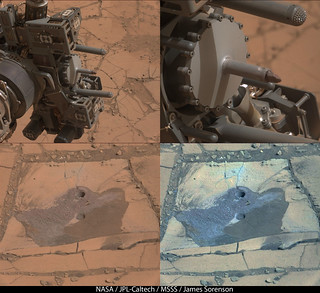
|
|
|
|
|
Sep 27 2014, 07:45 AM
Post
#434
|
|
|
Senior Member Group: Members Posts: 2346 Joined: 7-December 12 Member No.: 6780 |
Thanks a lot! I'll take it as an invitation to dig a little deeper into PDS camera calibration, to find out the precise meaning of the color corrections.
Applied to the current tailings, saturation looks a little too low, and hue too bluish to be the "true" colors as they would be under white light. But I'm not sure, whether that's the appropriate expectation; maybe the adjusted colors represent more the deviation from the overall orangish tone; or it's the different light condition at Pahrump. No wonder they called one of the targets 'Paradox'. |
|
|
|
|
Sep 27 2014, 05:14 PM
Post
#435
|
|
|
Senior Member Group: Members Posts: 2511 Joined: 13-September 05 Member No.: 497 |
QUOTE (Gerald @ Sep 27 2014, 12:45 AM) dig a little deeper into PDS camera calibration, to find out the precise meaning of the color corrections. This discussion should be moved over to "images and cameras" where I thought we'd beaten it to death already. ADMIN: It has been. Technically you can't just multiply the square-root-encoded data. The PDS correction process linearizes the images and applies the corrections. That said, working entirely in non-linear space may be OK for the dynamic range of the typical image. -------------------- Disclaimer: This post is based on public information only. Any opinions are my own.
|
|
|
|
|

|
Lo-Fi Version | Time is now: 29th April 2024 - 02:17 AM |
|
RULES AND GUIDELINES Please read the Forum Rules and Guidelines before posting. IMAGE COPYRIGHT |
OPINIONS AND MODERATION Opinions expressed on UnmannedSpaceflight.com are those of the individual posters and do not necessarily reflect the opinions of UnmannedSpaceflight.com or The Planetary Society. The all-volunteer UnmannedSpaceflight.com moderation team is wholly independent of The Planetary Society. The Planetary Society has no influence over decisions made by the UnmannedSpaceflight.com moderators. |
SUPPORT THE FORUM Unmannedspaceflight.com is funded by the Planetary Society. Please consider supporting our work and many other projects by donating to the Society or becoming a member. |
|


